
The Chart of Accounts in QuickBooks Online is the master list of every account your business uses to track money in and out. Open it now by going to All apps → Accounting → Chart of accounts, and check your top accounts and opening balances first. Account types and starting balances drive everything downstream on your Balance Sheet and Profit & Loss, so a wrong setting there quietly corrupts every report you pull later.
TL;DR:
- Most small businesses need to manually enter opening balances after importing their chart of accounts to prevent reconciliation drift.
- Defaults such as opening balance equity and retained earnings cannot be deleted, but they can be renamed and should generally be left unchanged.
- Using subaccounts instead of multiple sibling accounts helps maintain a cleaner chart and improves reporting clarity.
- Account numbering should follow GAAP-style ranges and be assigned in blocks to allow room for future accounts without renumbering.
- Complex cleanup like correcting account types or fixing mismatched balances is best handled by a professional ProAdvisor to ensure accurate financial reporting.
Table of Contents
- How Do You Find the QuickBooks Online Chart of Accounts?
- How Do You Add, Edit, or Import Accounts in QBO?
- What Account Types and Detail Types Mean for Your Reports
- Should You Turn On Account Numbers?
- Which QBO Accounts Can't Be Deactivated or Deleted?
- How Do You Merge, Inactivate, or Reorganize Accounts?
- How Many Accounts Can You Have on Each QuickBooks Plan?
- Should You Start From an Industry Template?
- What's the Cleanup Checklist for a Messy Chart of Accounts?
- When Should You DIY vs. Bring in a ProAdvisor?
- How Mygappro Helps You Fix or Set Up Your QBO Chart of Accounts
- Sources
- FAQ
How Do You Find the QuickBooks Online Chart of Accounts?
You get there fastest through the left navigation menu: click Bookkeeping or Accounting, then Chart of accounts. On some plans, the same screen sits under Settings (the gear icon) in the Your Company column, labeled directly as "Chart of accounts."
Once you're there, the Chart of accounts screen is a complete list of your company's accounts and balances, and QBO customizes that starting list automatically based on the business entity you chose during setup. A sole proprietorship gets a different default lineup than an S corp.
Before you touch anything, scan these columns:
- Name — the account label shown on reports and in transaction dropdowns
- Account type — determines whether it lands on the Balance Sheet or the Profit & Loss statement
- Detail type — a subcategory that refines how QuickBooks buckets the transaction
- QuickBooks balance vs. Bank balance — flags a mismatch you need to reconcile
- Number — visible once account numbers are turned on
Click the small arrow in the Action column next to any account to open its register, run a quick report, or edit its settings without leaving the list view.
How Do You Add, Edit, or Import Accounts in QBO?
Most small businesses need to do both: add a handful of accounts by hand and, if migrating from another system, import a larger batch at once. The steps differ, and mixing them up is where most cleanup problems start.
To add a single account manually:
- Click New in the top right of the Chart of Accounts screen.
- Select the Account type (Bank, Credit Card, Income, Expense, etc.).
- Choose a Detail type that matches how the account behaves.
- Name the account and, if it belongs under a broader category, check Is sub-account and pick the parent.
- Enter an opening balance and the As of date, matching the figure on your actual bank or credit card statement for that date.
- Save.
Skipping step 5, or guessing at the number, is the single biggest source of reconciliation drift after a migration. Intuit's own guidance is explicit that the opening balance and its As of date should mirror your bank statement exactly.
To import a chart of accounts: use Import Data, upload a spreadsheet with Name, Account type, and Detail type columns, and map each field to the matching QBO field. Here's the catch most people miss: opening balances are not imported even when your spreadsheet has that column filled in. You have to enter every opening balance by hand afterward.
After any import, run this checklist: confirm account count matches your source file, verify account types didn't default incorrectly, enter opening balances one by one against statements, and reconcile each new account for its first period before recording new transactions against it.
Pro Tip: Import the account structure first, save the file, then come back and add opening balances in small batches. Trying to do both at once is how duplicate or mismatched balances slip through unnoticed.
What Account Types and Detail Types Mean for Your Reports
Every account you create belongs to a core category, and that category decides which financial statement it shows up on. Get this wrong and your Profit & Loss or Balance Sheet will be technically populated but practically useless.
Balance Sheet categories include Bank, Accounts Receivable, Other Current Assets, Fixed Assets, Accounts Payable, Credit Card, and Equity. Profit & Loss categories include Income, Cost of Goods Sold, and Expense.
Detail type sits one level below account type and tells QuickBooks how to treat the account inside reports and forms:
- A Bank account type with detail type "Checking" behaves differently in bank feed matching than one set to "Savings."
- Cost of Goods Sold with detail type "Supplies & Materials" separates job costs from a general Expense account tagged "Office/General Administrative Expenses."
- Accounts Receivable must stay as that type for invoicing and customer aging reports to function at all.
- Service Income versus Sales of Product Income as detail types lets you split revenue lines on the P&L without creating separate top-level accounts.
Get the account type right first, then use detail type to add precision, not the other way around.
Should You Turn On Account Numbers?
Account numbers are optional in QuickBooks Online, but for any business working with an accountant, bookkeeper, or eventual audit, they're worth enabling early rather than retrofitting later.
Turn them on under Settings → Account and settings → Advanced → Chart of accounts → Enable account numbers. Check Show account numbers if you want them visible in transaction forms and dropdowns, not just reports.
The recommended numbering approach follows familiar GAAP-style ranges:
- 10000 to 19999 for assets
- 20000 to 29999 for liabilities
- 30000 to 39999 for equity
- 40000 to 49999 for income
- 50000 to 59999 for cost of goods sold
- 60000 to 69999 for expenses
Even businesses that never display numbers to staff benefit from mapping accounts this way. Consistent account numbering makes cross-system reporting faster and speeds up any handoff between QuickBooks Online and a desktop GAAP workflow.
Pro Tip: Assign numbers in blocks of ten (10100, 10200, 10300) instead of consecutive digits. It leaves room to insert new accounts later without renumbering everything.
Which QBO Accounts Can't Be Deactivated or Deleted?
QuickBooks Online creates certain accounts automatically based on your entity type, and several of them are locked into place because the software depends on them for core functions.
- Opening Balance Equity — captures the difference when you enter starting balances; can be renamed but shouldn't be deleted.
- Retained Earnings — rolls forward prior-year net income automatically; QuickBooks won't let you deactivate it.
- Uncategorized Income and Uncategorized Expense — catch transactions during bank feed imports before you assign a real category.
- QuickBooks Checking — tied to the built-in banking feature, if you use it.
Some of these default and special accounts can be edited or renamed but never deactivated, since removing them would break automated postings and year-end rollovers. Accountants generally advise leaving them alone unless you're working through a documented cleanup with someone who understands the downstream effects.
How Do You Merge, Inactivate, or Reorganize Accounts?
Cleanup work is where most chart of accounts problems either get fixed or get worse. The tools are simple, but the sequence matters.
- To inactivate an account: click the dropdown in the Action column and choose "Make inactive." This hides the account from new transactions but preserves historical data on past reports.
- To merge duplicate accounts: rename one account to match the other exactly (same name, same account type), and QuickBooks prompts you to merge them. Only merge accounts with identical types. Merging across different account types corrupts historical reporting and can't be undone.
- To lock a parent account: use subaccounts instead of creating many similar sibling accounts. Grouping "Utilities: Electric" and "Utilities: Gas" under a parent keeps your top-level list clean while still separating detail for job costing or tax prep.
Subaccounts win over flat sibling lists almost every time reporting clarity matters, especially once you're tracking more than a dozen expense categories.
How Many Accounts Can You Have on Each QuickBooks Plan?
Your QuickBooks Online plan sets a hard ceiling on how many accounts you can create, and that ceiling matters more than most new users expect.
- Simple Start and Essentials cap the chart of accounts at a limited count, which can feel tight for businesses running multiple bank accounts, credit cards, and detailed expense categories.
- Plus raises the limit but still caps it.
- Advanced removes the account limit entirely and adds deeper tracking features, including custom fields and enhanced reporting.
If you're deciding between QuickBooks Essentials and Plus, the real question is whether you need class or location tracking and multiple currencies, not just account count. Watch for the warning signs that you've outgrown your plan: you're renaming accounts to squeeze more categories into fewer slots, or you keep hitting the "maximum accounts reached" message when adding a new vendor category.
Should You Start From an Industry Template?
Starting from an industry-specific chart of accounts can save hours of setup time, particularly for businesses with reporting needs that don't map cleanly onto the generic default list.
Construction companies, nonprofits, and hospitality businesses tend to benefit the most from industry-specific templates, since each of those industries tracks job costs, restricted funds, or inventory categories that a generic retail template ignores entirely.
- Look for templates built specifically for your industry rather than adapting a generic small-business list.
- Import the template's structure first, then delete anything irrelevant to your actual operations before you start entering opening balances.
- Keep the account types and detail types from the template intact even if you rename accounts. That preserves report integrity when you later compare your numbers to industry benchmarks.
What's the Cleanup Checklist for a Messy Chart of Accounts?
A tidy chart of accounts follows a handful of consistent rules, and most of the mess accountants see comes from skipping them early on.
Use clear, consistent account names. Prefer subaccounts over dozens of nearly identical top-level accounts. Write down your naming conventions somewhere your bookkeeper can reference them. And reconcile every opening balance against a real bank or credit card statement before you consider setup finished.
The three mistakes that show up most often in cleanup work: duplicated accounts created because someone typed a slightly different name, expenses misclassified into the wrong detail type (which quietly skews your P&L), and opening balances imported at the wrong figure with no reconciliation to catch it.
Six-step cleanup checklist:
- Export your current chart of accounts to review every account type and detail type at once.
- Flag duplicates by scanning for near-identical names.
- Merge only accounts sharing the exact same account type.
- Reconcile every Balance Sheet account against its statement for the opening period.
- Reassign misclassified expenses to the correct detail type.
- Document your final structure so future changes stay consistent.
Pro Tip: If you inherited a QBO file from a previous bookkeeper, run the full checklist before you file a single tax return off it. Misclassified detail types are invisible until you compare a report to reality.
When Should You DIY vs. Bring in a ProAdvisor?
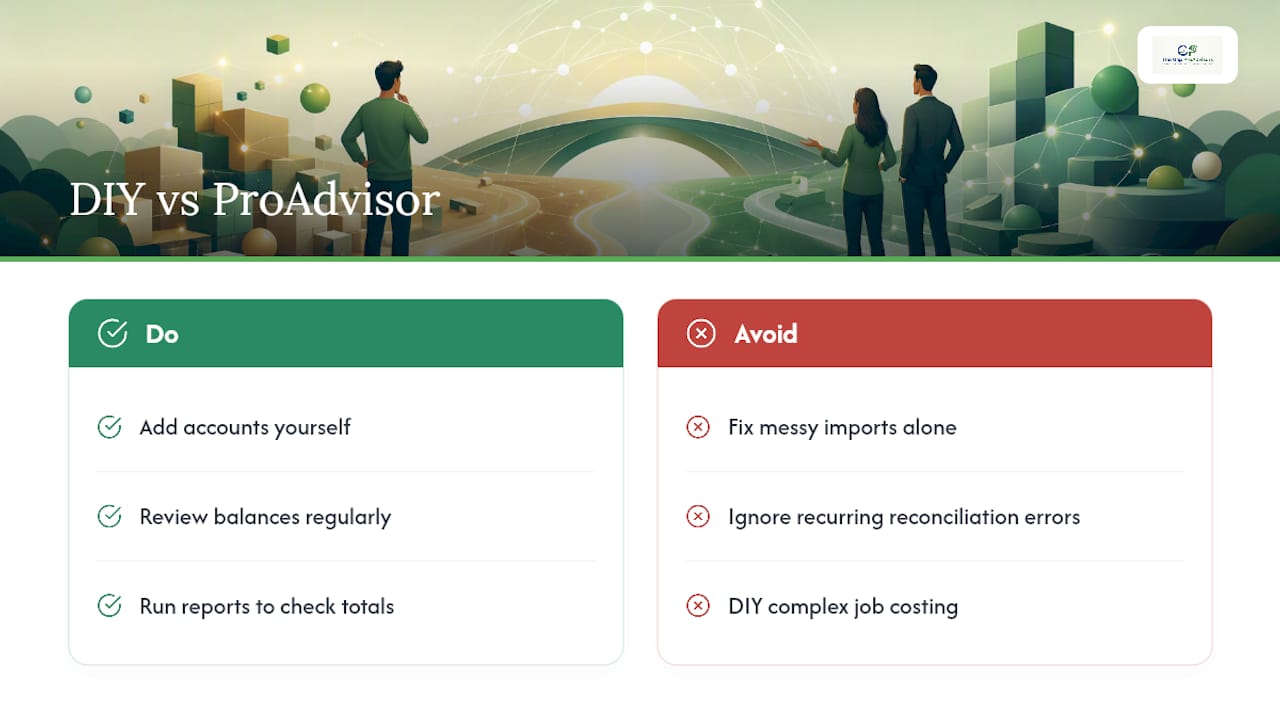
Most small business owners can handle the basics: adding an account, reviewing balances, running a report. Where things go sideways is usually the same three spots. Messy imports where opening balances never got entered. Reconciliation errors that repeat month after month instead of resolving. Job costing setups that need subaccounts and classes working together, which is a different skill than basic bookkeeping.
At Mygappro, cleanup work follows a pattern: a client migrates from desktop QuickBooks or another platform, imports the chart of accounts correctly, and then never circles back to fix the opening balances. Six months later, every report is off by the same stubborn amount, and nobody can trace why.
That's the moment to bring in help rather than keep guessing, especially if you want expert advice on running and tracking professional services financials through a solid professional services operations framework. A QuickBooks ProAdvisor can trace a discrepancy to its source in an afternoon that might otherwise cost you a full weekend of trial and error, and get your job costing structure set up correctly the first time instead of patched together after the fact.
— Angela
How Mygappro Helps You Fix or Set Up Your QBO Chart of Accounts
Mygappro is the alternative to guessing your way through a messy chart of accounts: instead of spending your own evenings tracing opening balance discrepancies, you hand the file to someone who fixes it once, correctly.

A typical engagement starts with a free health check on your existing QBO file. We look at account types, detail types, and whether your opening balances actually reconcile to your statements. If your chart of accounts needs real cleanup work, we scope it as a flat estimate before touching anything, so you know the cost upfront. From there, most clients move into an ongoing plan so the same mistakes don't creep back in month after month.
If you're dealing with duplicate accounts, a botched import, or reports that never quite balance, our bookkeeping cleanup service is built for exactly that. And if you're past the fix-it stage and just want your books handled going forward, our small business bookkeeping services cover ongoing QuickBooks support, reconciliation, and reporting on a flat monthly rate. Reach out for the free health check and see what your chart of accounts actually needs.
Sources
The steps and rules in this guide draw on Intuit's own documentation, which is worth bookmarking since QuickBooks updates its interface periodically.
- Chart of accounts in QuickBooks Online - Intuit
- How to import a chart of accounts in QuickBooks Online — Coefficient
Check these pages directly if your screen doesn't match the steps above. Intuit updates the interface fairly often.
FAQ
How do I get to the Chart of Accounts in QBO?
Go to Bookkeeping or Accounting in the left navigation menu, then select Chart of accounts. On some setups it's also accessible through Settings (the gear icon) under Your Company.
How do I create a Chart of Accounts in QuickBooks Online?
QuickBooks Online builds a starter chart automatically when you set up your company, customized to the business entity you select. From there, add individual accounts manually or import a larger set through Import Data, entering opening balances by hand afterward.
Does QuickBooks have a standard chart of accounts?
Yes, but it's not one fixed list. QBO generates a default set of accounts based on your entity type at setup, and you customize it from there by adding, editing, or importing accounts to match your actual operations.
What are the basic account categories in a chart of accounts?
The core categories are Assets, Liabilities, Equity, Income, and Expenses, with Cost of Goods Sold often treated as a distinct category on the Profit & Loss. Every account you create in QBO falls into one of these, which determines whether it lands on your Balance Sheet or your income statement.